
In the rapidly evolving digital landscape, managing numerous social media platforms simultaneously can feel like a Herculean task. Different platforms, different audiences, and different content strategies—it’s like juggling multiple conversations in different languages at once. However, with the right tool, managing all your social media platforms from one place becomes not just possible, but efficient and highly effective.
The Essentials of Effective Social Media Management 📋
1. Crafting Platform-Specific Content ✍️🏼
While a ‘one size fits all’ approach might work in some scenarios, it’s not the best strategy when it comes to social media. Each platform has its own language, unique features, and audience expectations. Twitter may call for quick, witty snippets, while Instagram requires visually appealing images or videos. Likewise, LinkedIn prefers a more professional tone. Crafting platform-specific content can boost your brand’s relevance and engagement significantly.
2. Scheduling and Publishing ⏰📆
Consistency is key in maintaining a robust online presence. Having a content calendar and scheduling your posts can be a game-changer. Whether you want to maximize your reach with optimal posting times or you prefer real-time posting, having an efficient system in place can free up your time and resources considerably.
3. Engaging with Your Audience 💬❤️
Your audience’s comments, messages, and mentions across platforms offer valuable opportunities for engagement. Replying to comments, addressing concerns, and even throwing in some humor can foster a strong bond between your brand and its audience. Efficiently managing these interactions is paramount in maintaining a positive and interactive online presence.
4. Data-Driven Insights and Performance Tracking 📊📈
Understanding what content resonates with your audience and why is the bedrock of any successful social media strategy. Regular performance reviews and competitor tracking can provide valuable insights. Additionally, tailoring your strategy based on these data-driven insights can propel your brand towards better engagement and growth.
One Platform to Rule Them All: The Power of a Unified Social Media Management Tool 🚀🔧
Employing an all-in-one social media management tool can revolutionize your approach to social media management. A comprehensive tool like Vista Social, which just happens to be on sale now, is one such example. It not only allows you to manage multiple platforms from one interface but also provides an array of powerful features like an AI assistant, content scheduling, a unified inbox, and insightful analytics.
Why Not Make Your Social Media Management More Efficient? 🎉
Mastering multi-platform social media management doesn’t have to be a headache. With the right approach and tools, you can create engaging, platform-specific content, interact with your audience, analyze performance, and optimize your strategy—all from one place.
Why not make your social media management more efficient and more effective? Consider taking advantage of the current sales on tools like Vista Social and transform the way you engage on social media! 🥳
Getting Started with Vista Social 🚀
1. Connecting Your Social Profiles 👥🔗
After creating your Vista Social account, you’ll find yourself on your new dashboard. The first order of business is connecting the social media profiles you intend to manage. With Vista Social, profiles are grouped to avoid confusion and overlapping of content among different brands.
To connect your profiles, click on ‘Connect social profiles’ in the initial setup guide on your dashboard and select the social network you want to link. Follow the steps to connect your profile, remembering not to modify permissions as this might lead to issues down the line.
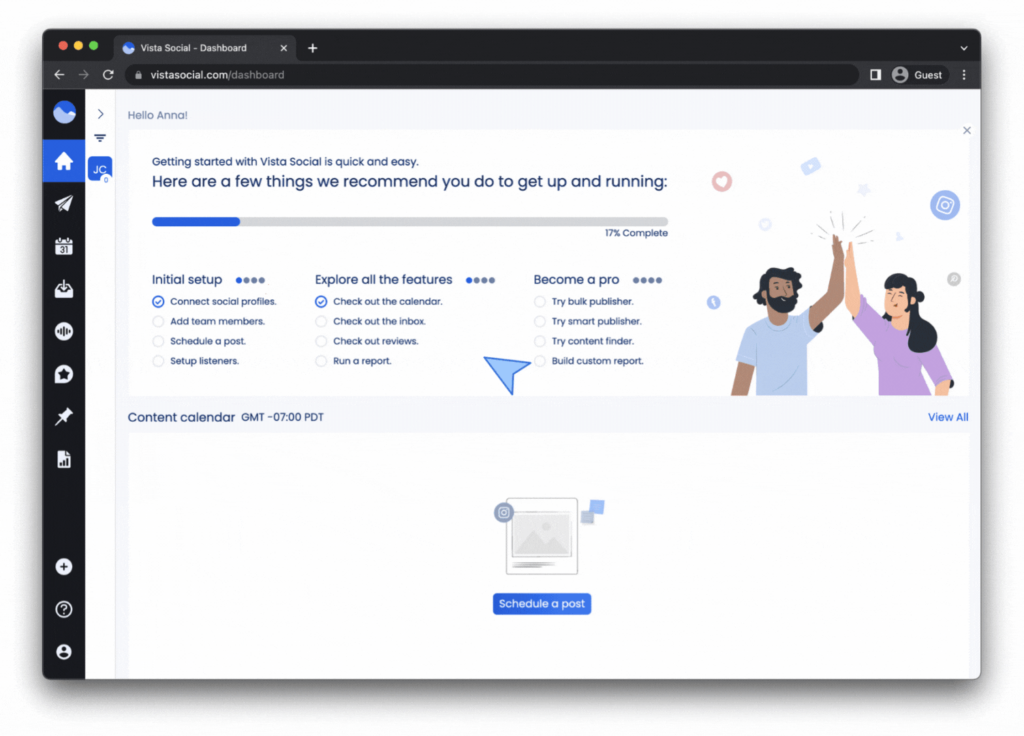
Alternatively, you can go to ‘Settings’ and select ‘Connected Profiles’ to add new profiles. Easy, right?
2. Adding Your Team Members 👥👥
Now that your social profiles are connected, it’s time to introduce your team. Navigate to ‘Settings > Team Members > Add team member’ and fill out the necessary information (First Name, Last Name, Email Address). Determine the role each member will play, designating them as either an admin or a restricted user. You can modify these roles at any time.
Note: This feature is only available on paid plans.
3. Enabling Browser Notifications 🖥️🔔
Before diving into content creation, we highly recommend enabling browser notifications. That way, you’ll be alerted whenever your posts encounter an issue. To enable this, navigate to ‘Settings > Accounts’, scroll down to ‘Browser Notifications’ and click ‘Subscribe’.
4. Scheduling Your First Post 🗓️✍️
You’ve set up your profiles and users, and now you’re ready to schedule your first post! Vista Social offers various methods for scheduling, including:
- Single post
- Bulk publishing
- Smart publishing
- Finding content
- Via browser extension (Chrome or Firefox)
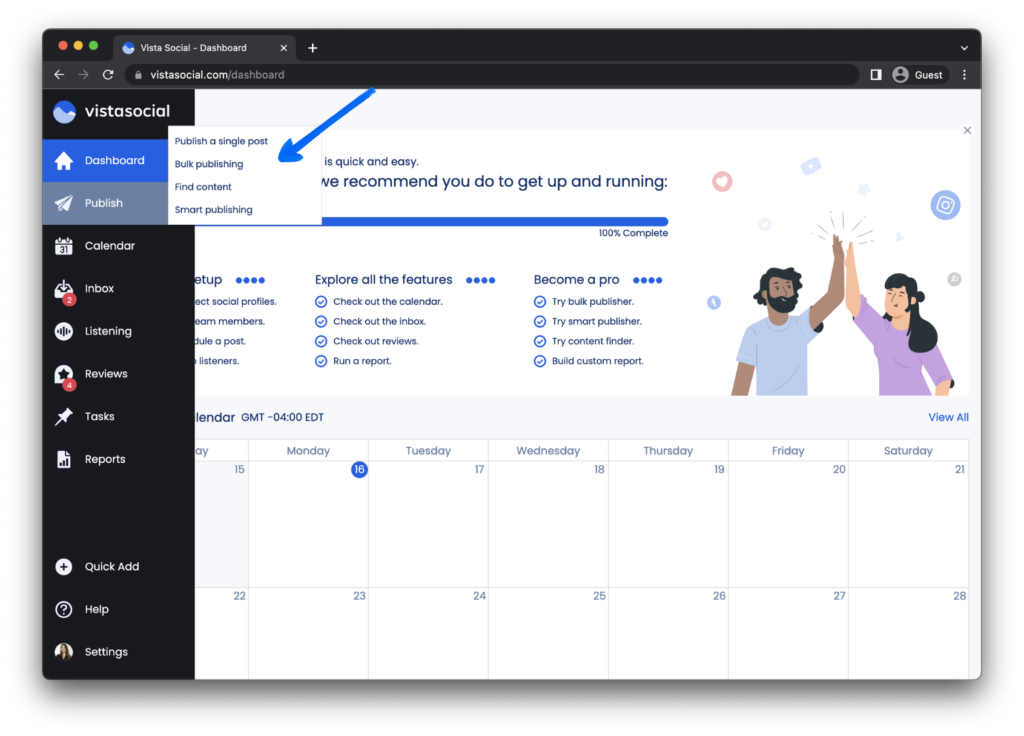
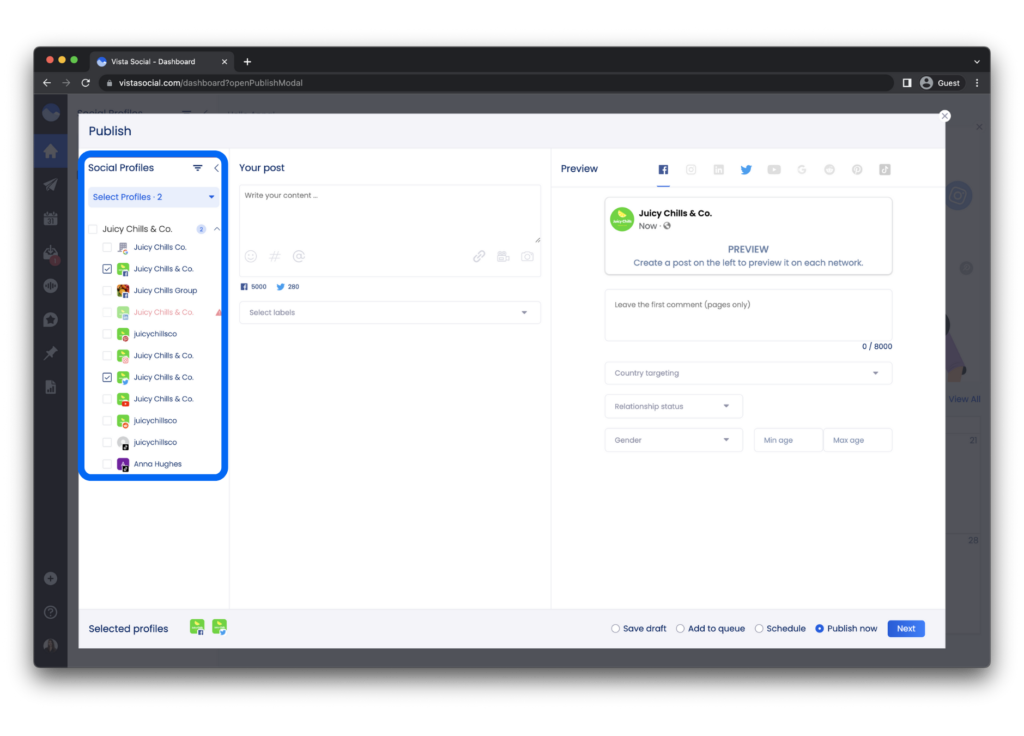
To access these publishing options, click on ‘Publish’ and choose your preferred method. Ensure the correct profile group and profiles are selected before scheduling your post. Once done, you can preview your post to make sure it looks just right before hitting ‘Schedule’.
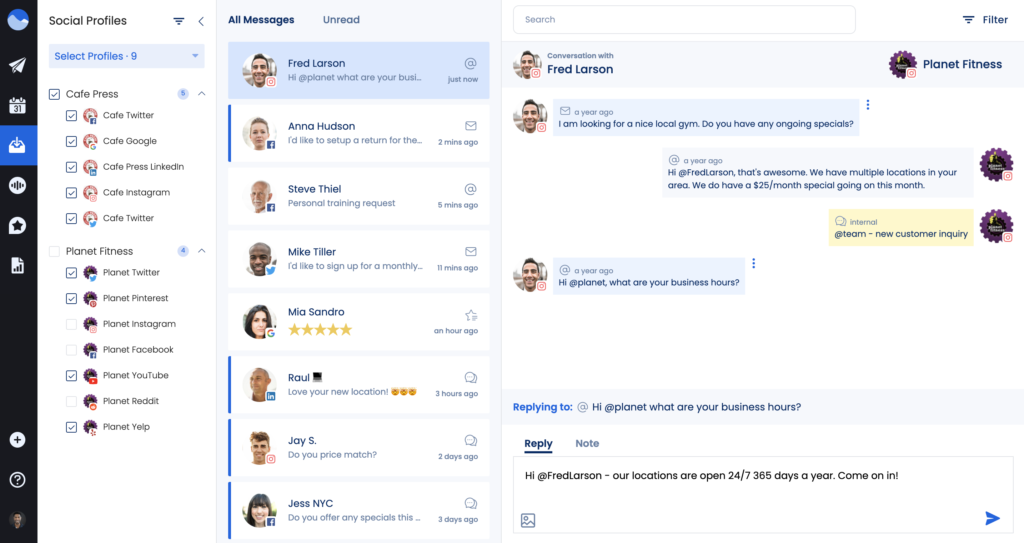
5. Responding to a Conversation 💬
After scheduling your post, take a peek at your Inbox. With Vista Social, you can monitor your social media activity right from your dashboard. You can view and respond to comments, mentions, messages, reviews, and shares from various networks.
You can filter your inbox activity by going to ‘Inbox’ and clicking ‘Filter’ on the upper right-hand corner of the page. Use the ‘Reply’ field to respond to messages and comments, and switch to the ‘Note’ tab to leave internal comments for your team members.
6. Setting up a Listener 🎧🔍
Listeners are your social media radars, monitoring your network for conversations containing specific keywords. To create a listener, navigate to ‘Listening’ on the menu and select ‘Add Listener’. Choose the profiles you want included in the search and add the relevant information like listener name, included and excluded keywords.
Once your listener is set up, it will appear on your list of listeners, displaying the name, number of profiles, and the status of the listener.
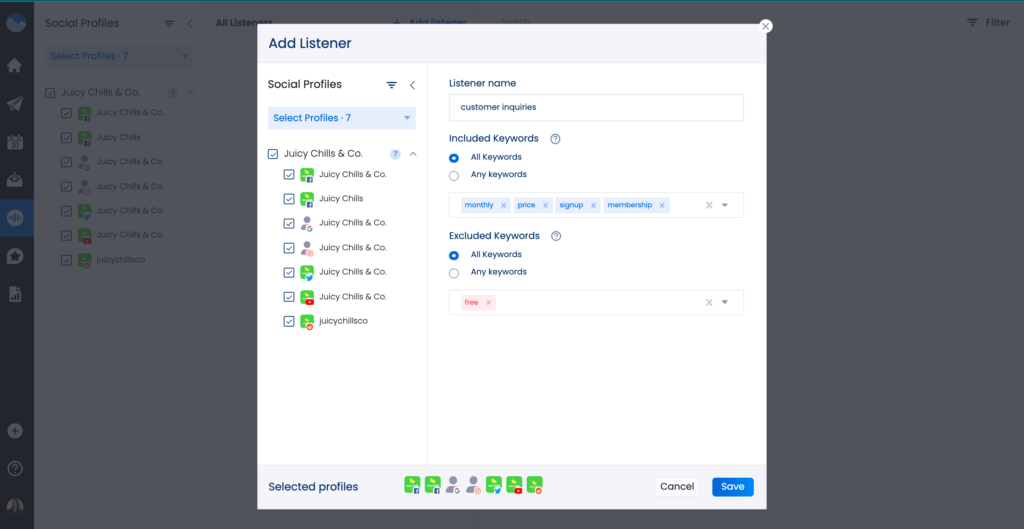
Note: This feature is only available to Pro users.
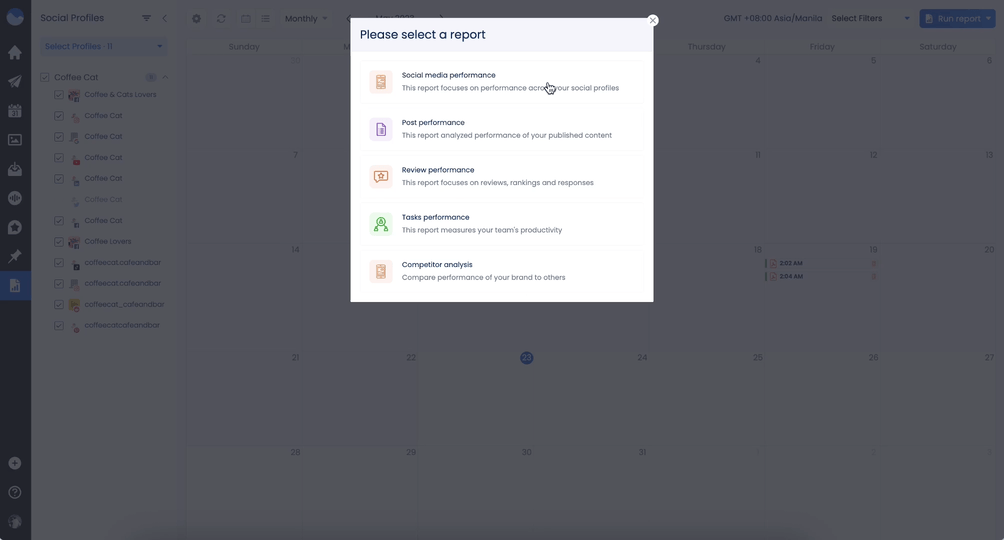
7. Running a Report 📊
Vista Social provides insightful analytics about your connected profiles. It takes about 2-3 hours for the initial data analysis to complete after connecting your profiles. After that, you can generate various types of reports:
- Social media performance
- Post performance
- Review performance
- Tasks performance
- Competitor analysis
To run a report, click on ‘Reports’ on the homepage and select ‘Run report’. Choose a report type, date range, and click ‘Download’. You can also schedule a report to run later or create a custom report if you need specific metrics.
Now that you are armed with this knowledge, it’s time to explore and conquer the world of social media management with Vista Social. Enjoy the journey!


GIPHY App Key not set. Please check settings