
ChatGPT is an incredible tool for generating human-like text, but it can feel isolating when it comes to team collaboration. However, with the introduction of ChatABC, you can now leverage the power of ChatGPT while collaborating seamlessly with your team. ChatABC offers a suite of features specifically designed for team collaboration, including shared prompts, document support, and custom branding. In this comprehensive guide, we will walk you through the process of using ChatABC to enhance team collaboration and make the most of its powerful features.
1. Getting Started with ChatABC
To begin using ChatABC for team collaboration, follow these steps:
- Sign up for ChatABC at chatabc.ai.
- Or get a super affordable license for a one-time fee on Appsumo.
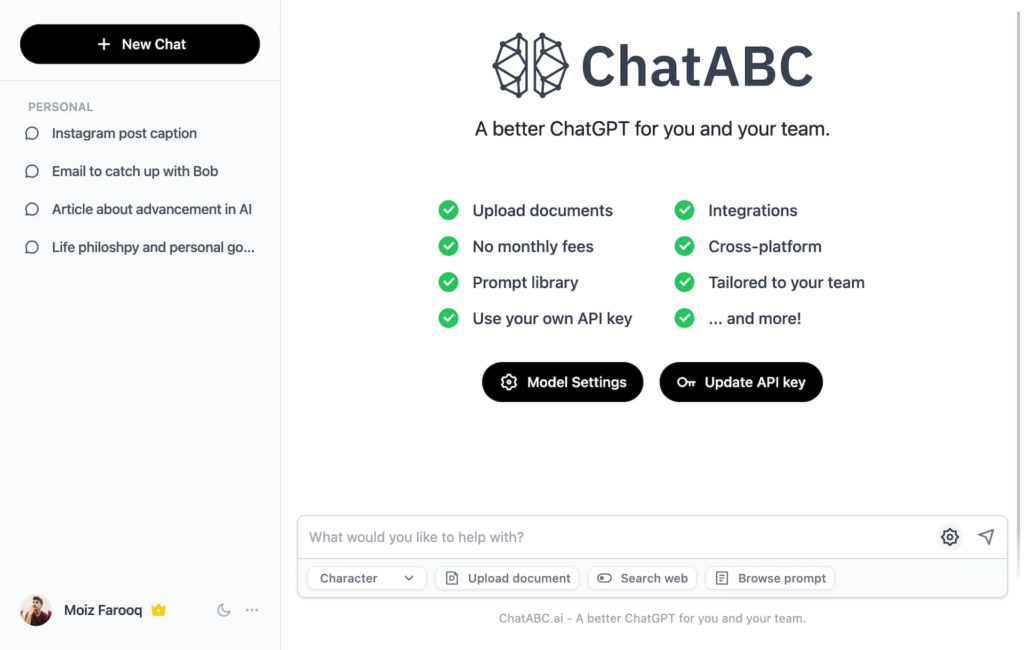
2. Choosing the Right Model
ChatABC offers a variety of models to choose from, including ChatGPT and GPT-4. Selecting the right model will depend on your team’s specific needs and preferences. Here’s how you can choose the model:
- On the ChatABC dashboard, navigate to the “Model Settings” section.
- Click on the drop-down menu to view the available models.
- Choose the model that suits your team’s requirements.
3. Uploading and Utilizing Documents
ChatABC allows you and your team to upload documents and extract information from them using the AI assistant. Follow these steps to upload and utilize documents:
- Locate the “Upload Document” feature in the chat interface or the sidebar.
- Click on the “Upload Document” button.
- Choose the document file you want to upload from your computer.
- Once the document is uploaded, team members can ask questions or request information related to the document.
4. Exploring the Prompt Library
ChatABC provides a rich prompt library with over 150 built-in prompts for various use cases. Your team can leverage these prompts to enhance chatbot conversations. Here’s how you can explore the prompt library:
- Access the prompt library by clicking on the “Prompt Library” option in the sidebar.
- Browse through the available prompts and select the ones that suit your team’s needs.
- Click on a prompt to insert it into the chat interface and initiate the conversation.
5. Organizing Chats with Folders
To keep chat conversations organized, ChatABC allows you and your team to create folders. Follow these steps to create folders and organize chats:
- Locate the “Folders” section in the sidebar.
- Click on the “New Folder” button.
- Enter a name for the folder and click on “Create” to create the folder.
- Drag and drop chats into the respective folders to organize them efficiently.
6. Collaborating with Your Team
One of the key features of ChatABC is its team collaboration capabilities. You can invite team members to your workspace and collaborate seamlessly. Follow these steps to collaborate with your team:
- Navigate to the “Team Members” section in the sidebar.
- Click on the “Invite Team Members” button.
- Enter the email addresses of your team members and send the invitations.
- Team members will receive the invitations and can join your workspace by creating their own accounts.
7. Customizing Your AI Assistant
ChatABC allows you to customize your AI assistant by choosing different characters. This customization adds a personalized touch to your chatbot experience. Here’s how you can customize your AI assistant:
- Find the “Supports Characters” section in the sidebar.
- Click on the drop-down menu to view the available characters.
- Choose the character that best represents your AI assistant’s persona.
8. Managing Output Settings
In ChatABC, you have control over the output settings of your AI assistant. You can select the language, tone, writing style, and format according to your preferences. Follow these steps to manage the output settings:
- Locate the “Output Settings” section in the sidebar.
- Adjust the language, tone, writing style, and format options as desired.
- Save the settings to apply them to your AI assistant’s responses.
9. Setting Up Custom Branding
With ChatABC, you can create a personalized experience for your team by setting up custom branding. This feature allows you to use your own domain, logo, and branding elements. Follow these steps to set up custom branding:
- Navigate to the “Custom Branding” section in the sidebar.
- Follow the provided instructions to configure your custom branding elements.
- Save the settings to apply your custom branding to the ChatABC platform.
ChatABC is currently available at a super affordable price starting from $39/one-time, thanks to its sale on AppSumo. Take advantage of this limited-time offer to enhance team collaboration and streamline your AI chatbot experience.
Congratulations! You have learned how to use ChatABC for team collaboration. By leveraging its powerful features, you can enhance collaboration, share prompts, utilize document support, and customize your AI assistant. Get started with ChatABC today and experience the power of ChatGPT in a team-friendly environment.


GIPHY App Key not set. Please check settings